ConsoleCast example firmware

The open source firmware can be used as-is if you just want to access a device using the built-in terminal emulator or it can serve as a starting point for custom development. ConsoleCast can be seen as a normal development board for prototyping your own solutions but with the example firmware you already have a rich set of features and functionality. We encourage users to clone the project and enhance it with their own ideas. Maybe other users can benefit from your enhancements too.
The code is written using Espressif's ESP-IDF framework. You will need to install the ESP-IDF framework to work with the code. Set the target chip to ESP32S2 as ConsoleCast is using the S2 variant. The example code consists of back-end code, running on ConsoleCast and a front-end part, running inside the browser. ConsoleCast comes pre-installed with the latest version but you can re-flash it with your modified code using the USB-C connector or by using a UART to USB bridge attached (see about page).
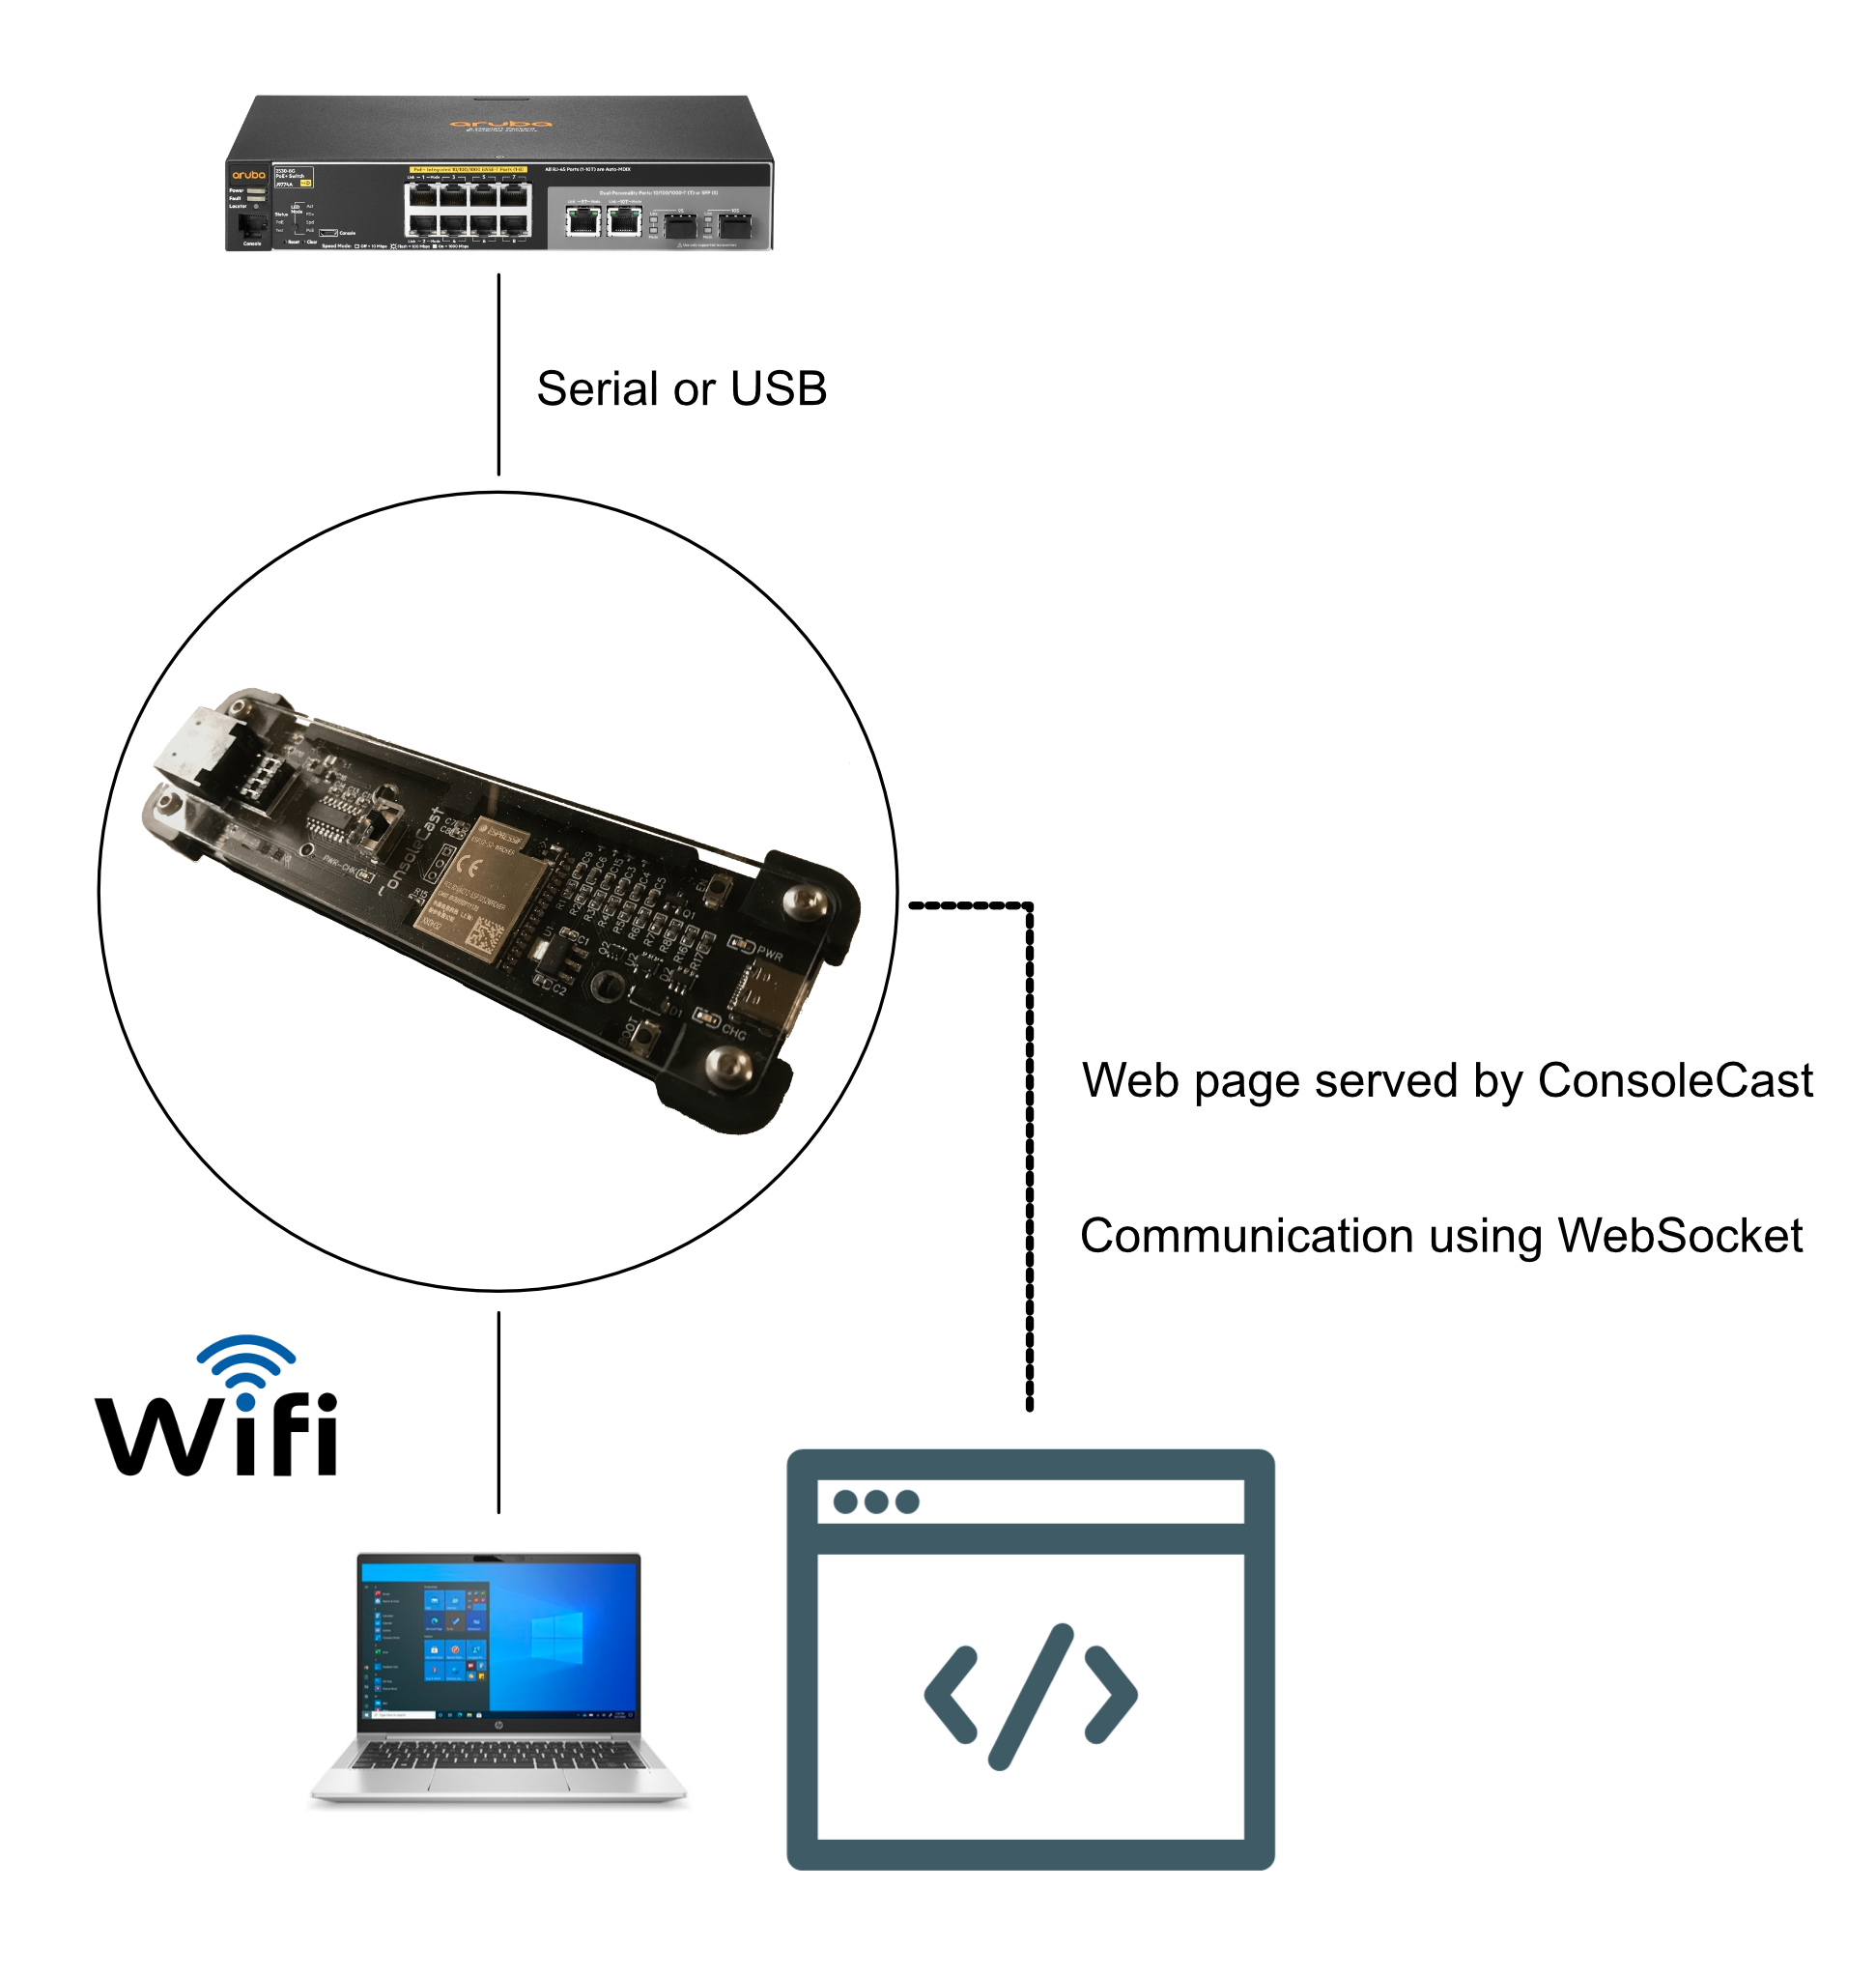
The back-end code, running on ConsoleCast, starts as an Access Point and spins up a secure webserver with mDNS so you can connect to it using "https://cc.local". ConsoleCast then serves the index.html file which is flashed on the device. This index file contains the Javascript code for the terminal functionality, Xterm.js is used here. Communication between the browser and ConsoleCast is done using WebSockets. Special token characters are used to indicate specific requests.
You don't have to use the webpage that's flashed onto ConsoleCast, you can write your own HTML/JS as well. You don't need a webserver for this to work. Just create a local html file and open it using the local file prefix "file:///". In your JS code you create a Websocket to "wss://cc.local/ws".
Tokens used for information exchange:
"§!" outgoing (link up)
ConsoleCast signals (confirms) that the WebSocket link is up.
"§©" incoming (communication settings)
The browser sends the communication settings (baudrate, databits, parity, stopbits, flowcontrol and communication type) to ConsoleCast.
"§±" in/out (SSID list exchange)
The browser sends the request for an SSID (with an index number from 0-9) and ConsoleCast replies with the SSID info for that index (if it exists). SSID scanning is done at startup and only the top 10 will be saved.
"§¡" incoming (request for station mode)
The browser sends the request to switch to station mode with the SSID and password and ConsoleCast will try to connect as station to the given SSID.
"§®" outgoing (port connected)
When the terminal is opened for the first time, a connection is established using one of both ports. This port choice is then communicated to all connected stations. Other users of the same session can not switch to a different port, they have to adhere to the choices made at the first connect.
The code has two main parts for the serial port and for the USB port. The code for using the serial port is fairly straight forward and uses the plain IDF functionality for serial communication. The USB host code currently is using the USB Host Library API which is in beta right now. We will try to keep the code up-to-date with later releases. Before using USB host functionality ConsoleCast has to be configured to reverse the VBUS power direction. That is, in host mode, ConsoleCast no longer draws power but should supply power to the USB bus. The reversal is done in code by setting VBUS_R high (see code).
Xterm JS is used for the terminal. All characters typed are sent to ConsoleCast (over WebSockets) and passed on to the currently active port. Characters received by ConsoleCast from the attached device are sent to the browser. Only the tokens are handled as stated above.
Self signed certificate
The certificate ConsoleCast is using, is embedded in the firmware during the build of the firmware. If you want to generate your own certificate it should be placed in a "cert" directory inside the "main" directory. This directory and certificate files are not published on Github for obvious reasons. The "component.mk" and "CMakeLists.txt" files inside the "main" directory reference the certificate files:
component.mk file:
COMPONENT_EMBED_TXTFILES := certs/servercert.pem
COMPONENT_EMBED_TXTFILES += certs/prvtkey.pem
CMakeLists.txt file:
EMBED_TXTFILES
"certs/servercert.pem"
"certs/prvtkey.pem"
For generating your own certificate files you need to install OpenSSL. The way to do this, fully depends on your operating system. There are many instructions and tutorials available on the Internet. After installing you need a config file (see example below). Then you can generate your certificate files using "openssl" with this config file (see example below).
OpenSSL example:
openssl req -new -nodes -x509 -days 10000 -keyout prvtkey.pem -out servercert.pem -config consolecast.cfg
consolecast.cfg file:
[req]
default_bits = 4096
default_md = sha256
distinguished_name = req_distinguished_name
x509_extensions = v3_req
prompt = no
[req_distinguished_name]
C = NL
ST = NB
L = SomeCity
O = NickStick
OU = Design
CN = cc.local
[v3_req]
keyUsage = keyEncipherment, dataEncipherment
extendedKeyUsage = serverAuth
subjectAltName = @alt_names
[alt_names]
DNS.1 = cc.local
Building and flashing the firmware
When you have your certificate files generated and put in the "main/cert" directory, you can build and flash the firmware using the normal IDF tools. You can either use the USB-C connector (DFU mode) or use an external USB to UART module (see about page).
The normal sequence would be "idf.py set-target esp32s2" to clean the build directory and setting the target (ESP32s2) and then using one of the methods below. Note that for DFU you will have to put ConsoleCast in flash mode by pressing reset (the EN switch) or from OFF to ON while holding down the BOOT switch.
Using the USB-C connector:
- reset (EN or on-switch) with BOOT pressed
- idf.py dfu
- idf.py dfu-flash
Using the UART:
- idf.py build
- idf.py flash
Custom firmware suggestions
Although you can use the stock firmware (with the included webpage that has the terminal) as a quick way to connect to a serial device, there are other things you could use ConsoleCast for. You could implement "Standard Commands for Programmable Instruments" or SCPI for automating certain tasks in the lab. You could schedule tasks or automate measurements, have a look at possible things you could do (but when using ConsoleCast you could do this wireless and from within a browser). From within the browser you can use JavaScript to "talk" to ConsoleCast, use the embedded example HTML/JS as an example. However, you are not limited to a browser interface. You could use Python scripts to talk over WebSockets to ConsoleCast to provide very specific functionality. Or maybe you have other serial equipment (like robots or machinery) you would like to hook-up to your existing network. The possibilities are almost endless when your goal is to control equipment over a serial connection.
In the IT systems arena you could think about automating certain provisioning tasks or update/upgrade tasks for network equipment. You could "play" scripts or record config data. You can choose to customise the firmware or to implement more functionality outside of ConsoleCast with scripts that communicate using WebSockets or some other mode of communication.
SCPI Example
The easiest way to get going is to leave the firmware as is but create your own front-end code (webpage for example) that communicates using Websockets to the standard ConsoleCast firmware. As an example we published a simple SCPI front-end example for the Owon XDM2041 multimeter.
The JS code in this simple example scans every websocket message for tokens '§!' (link up) and '§®' (port connected). When the link to ConsoleCast is up, the code sends a string for the COM port settings: '§©9600,8,0,1,0,0'. The format used here is:
COM settings format:
- §© = Token for communication settings
- baudrate (number)
- databits (number 8, 7, 6 or 5)
- parity (number 0 = none, 2 = even or 3 = odd)
- stopbits (number 1 = 1, 2 = 1.5 or 3 = 2)
- flowcontrol (number 0 = none, 1 = HW or 2 = SW)
- port (number 0 = RJ45 serial or 1 = USB-C CDC)