ConsoleCast Usage
Here we assume you are using the pre-loaded (flashed) example firmware ConsoleCast came with. Below you will find instructions for using this default firmware to connect to a serial device port using the built-in Terminal. Also see the short introduction video demonstrating the process.
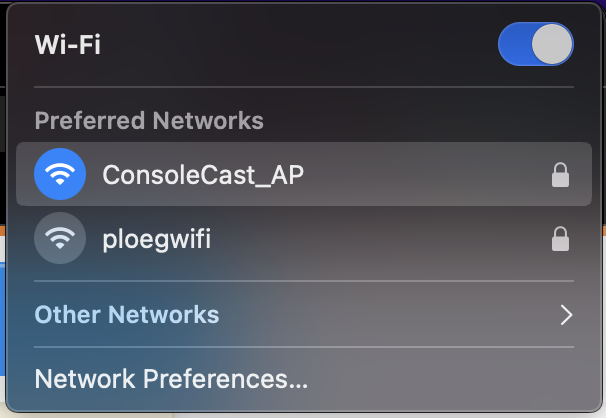
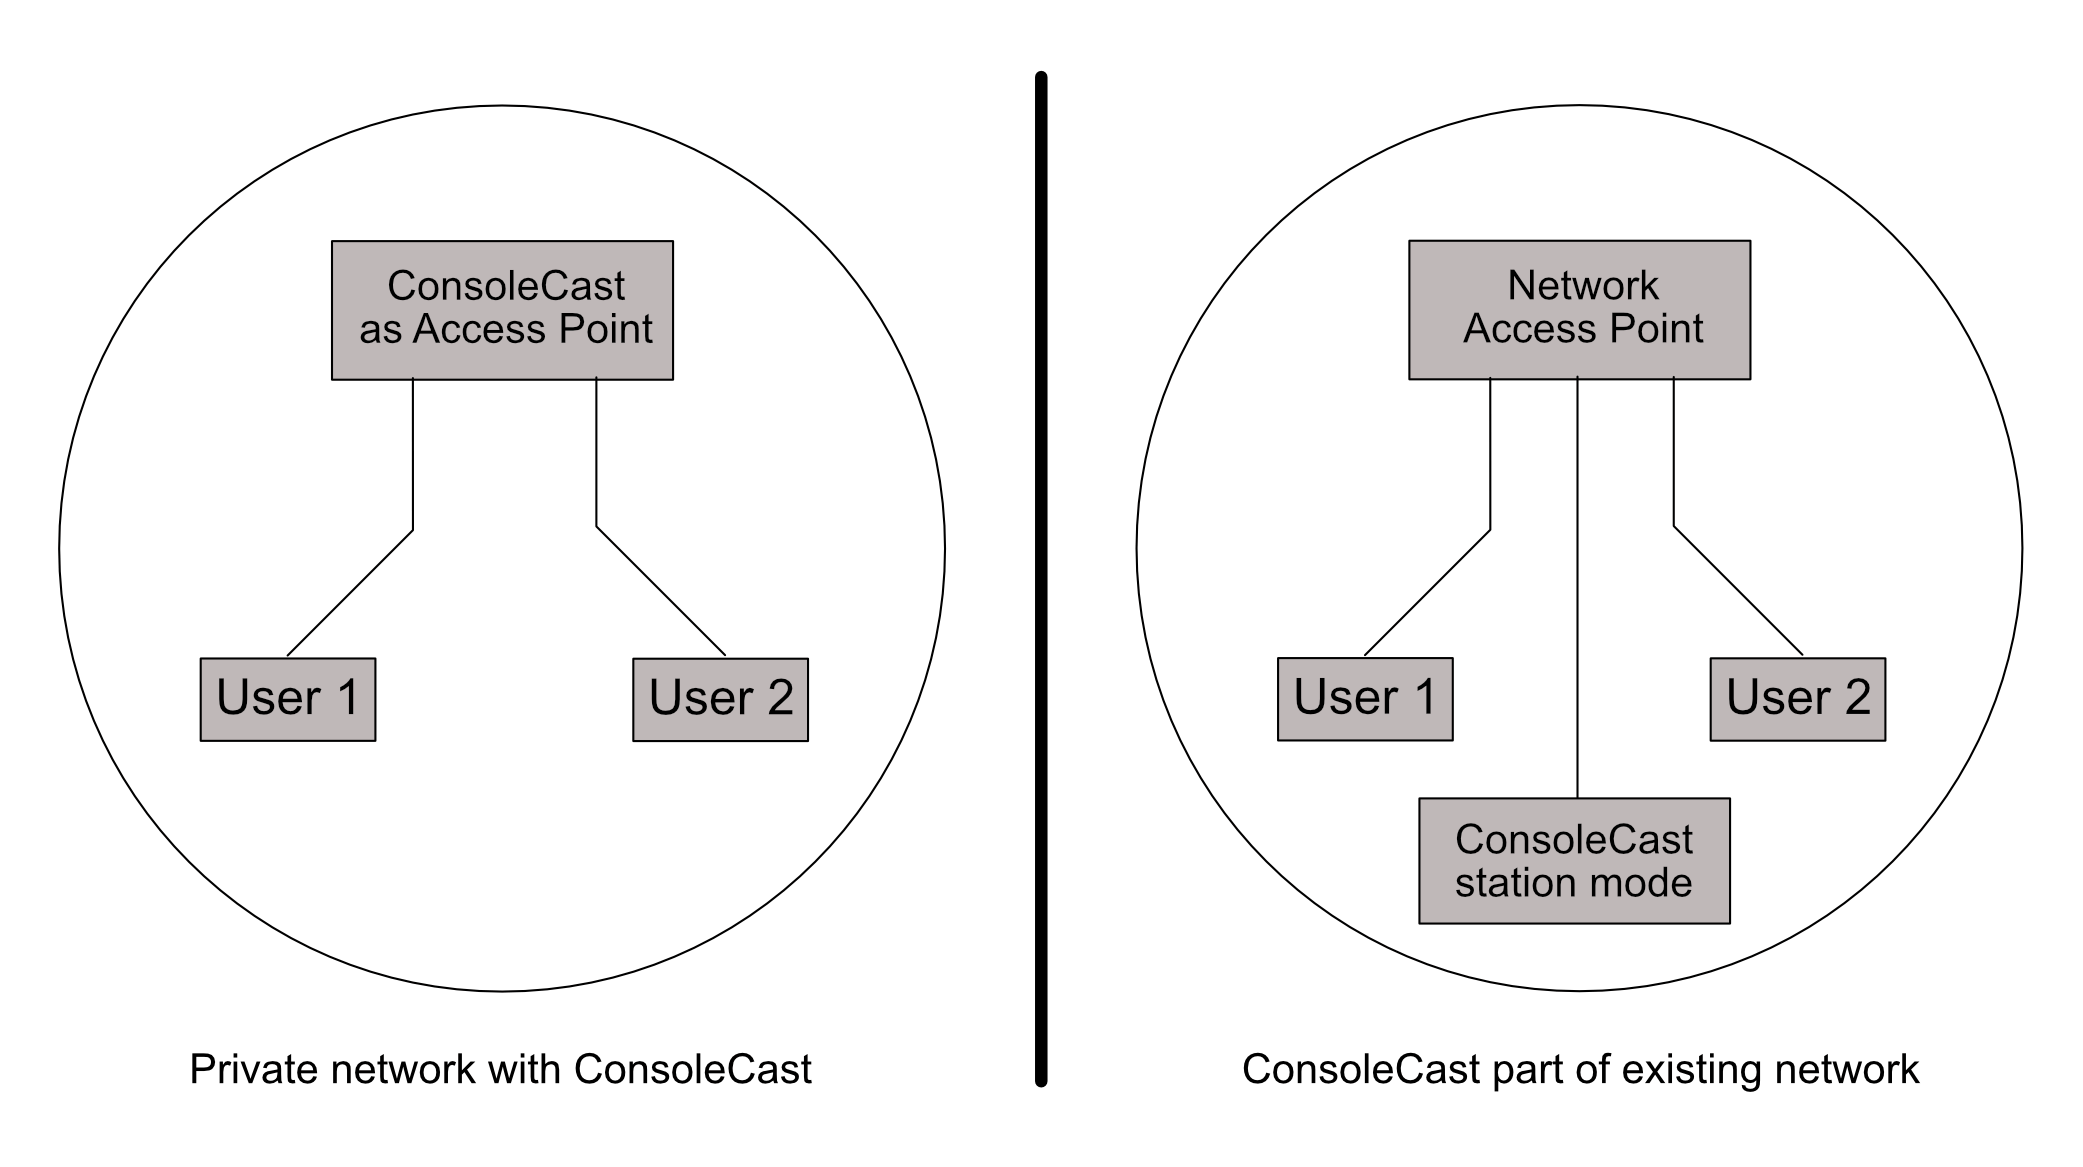
When ConsoleCast has power (battery or by USB-C connector) and is switched on (on/off switch) or reset is pressed (EN button) it will start an Access Point with the name "ConsoleCast_AP". You can connect to it using the default initial password "castaway". When switching on ConsoleCast you will see the TX/RX LEDs flash for a short time while ConsoleCast is starting its services.
There can be a warning that there is no Internet access. That's because this setup creates a private network, not connected to any external resources or Internet access. Now you can load the ConsoleCast webpage. The URL is "https://cc.local". You need to use the "https" prefix here, as ConsoleCast only serves secure (encrypted) content. You will probably get a warning that the site isn't secure. That's because the https certificate used by ConsoleCast is not yet known by your system. You can try to ignore this and continue in this insecure mode if your browser lets you. But you will not get the padlock symbol. A better way would be to add the certificate as secure to your system (see Add the ConsoleCast Certificate as Trusted).
Now you will be welcomed with the main page. Loading the page can take a moment, ConsoleCast is just a small embedded system and has limited recources.
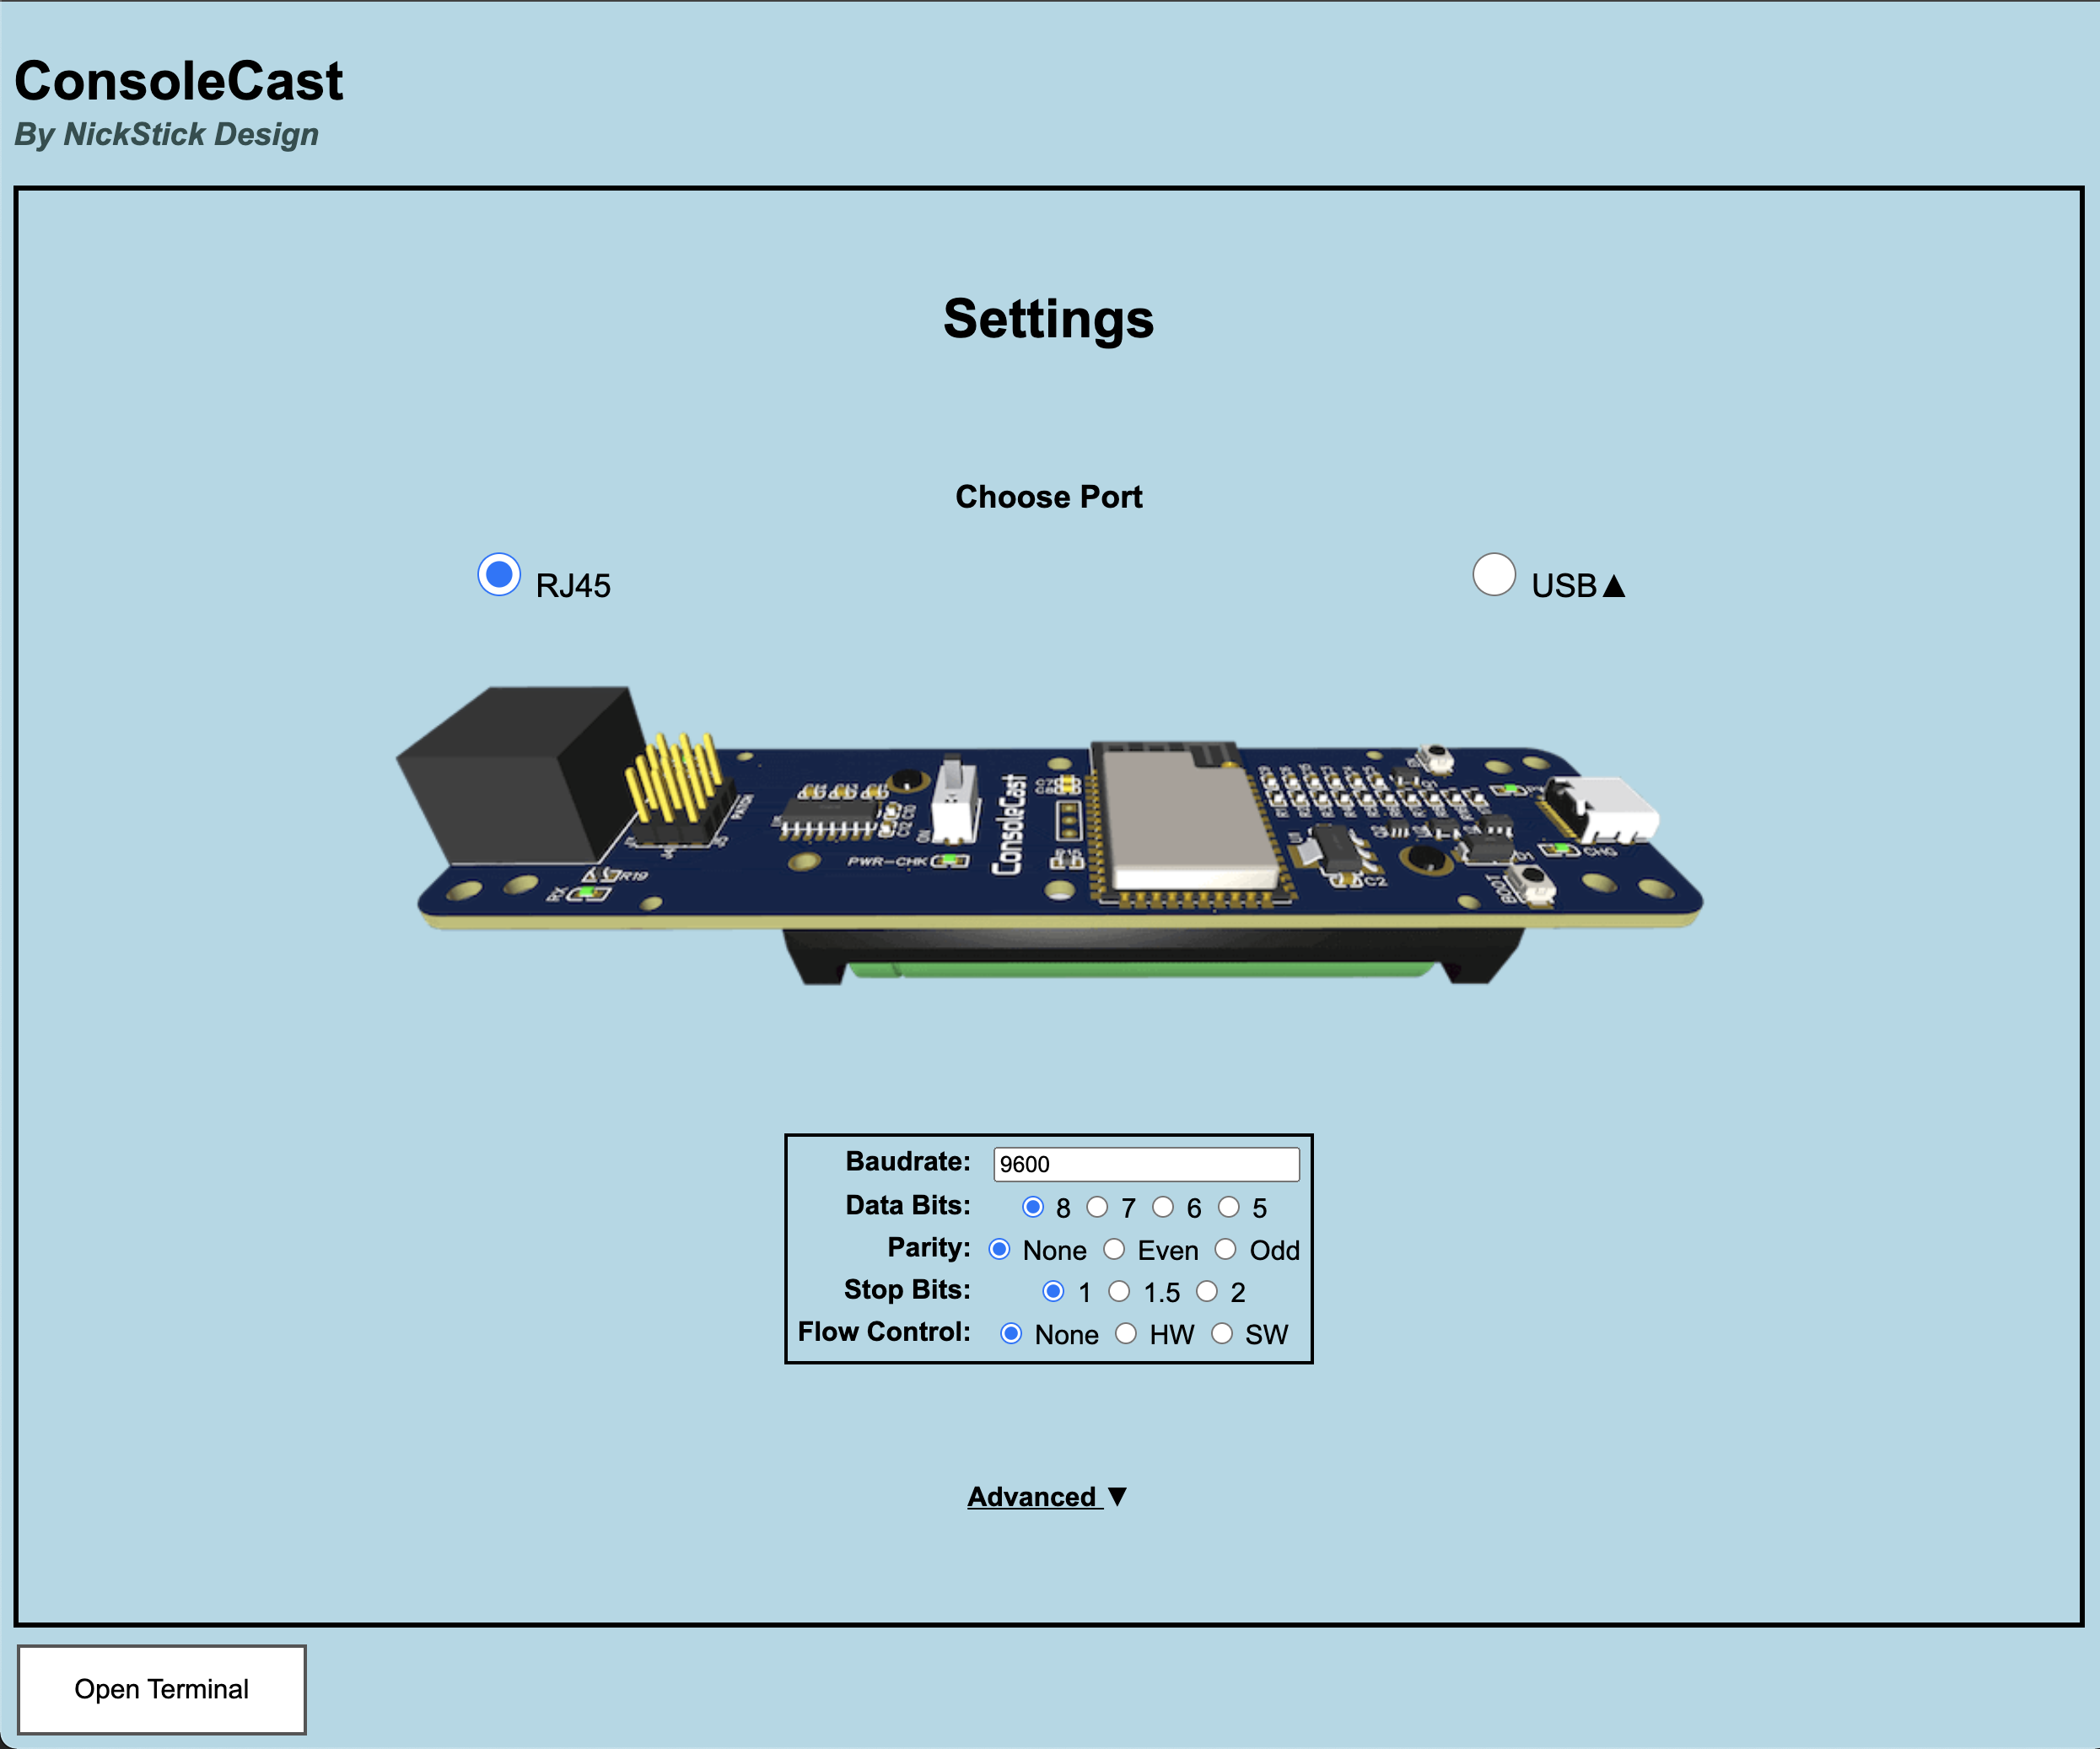
Before opening the on-board terminal you can choose the port you are using (RJ45 or USB). This is the port you have connected to the device you want to open a terminal session for. Also you have the option to change the serial settings like Baudrate, Data Bits, etc. The default settings are most common but maybe you have to set a different Baudrate. In some cases it doesn't matter what Baudrate you choose, some devices detect your settings automatically. Later on we have a look at the Advanced settings.
Now you can press "Open Terminal" to open the connection to the device you have connected to ConsoleCast. Sometimes you have to press Enter a few times for the device to recognize your settings before you will get a response. If you do not get a response you can try to reset the device ConsoleCast is connected to (if that's an option) or maybe use a different port (if available). If you do get a response but it's gibberish you probably have to adjust your settings (most likely the Baudrate).
Multi user and network access
With the above setup you can also login a second user. From a second computer, just connect to the same ConsoleCast Access Point and go to the URL. You will share the same session. Both can type and read the same responses.
As said earlier, ConsoleCast has limited resources. If you try to connect more then 2 sessions it will probably run out of resources and not let you connect. This can also happen when reconnecting (if resources are not released in time). It's best to reset ConsoleCast (on/off switch) when ConsoleCast is not responding when trying to connect. And it helps to let it fully load before trying to add another connection. You will see short flashing of the indicator LED's when ConsoleCast is processing requests. If it is out of resources the flashing no longer occurs.
There's also a completely different setup where you connect ConsoleCast to an existing wireless network. When doing so, you can access ConsoleCast from this existing network. No need to connect to ConsoleCast directly. In this mode ConsoleCast works in Station mode and connects to an existing wireless network. From there on, ConsoleCast is available from any host connected to this network. This can even be a remote host connected to this network.
The setup for ConsoleCast to connect to an existing network can be found under Advanced on the main page (Click on Advanced).
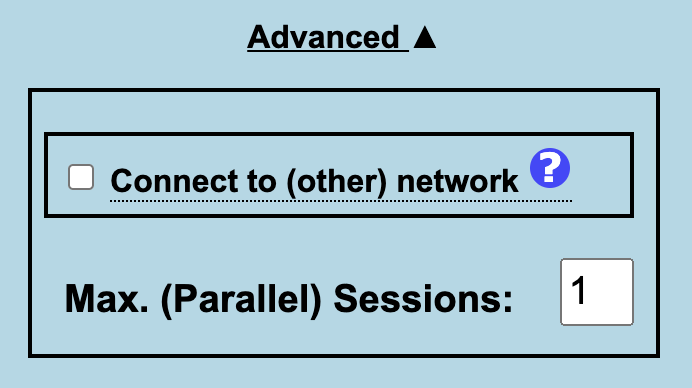
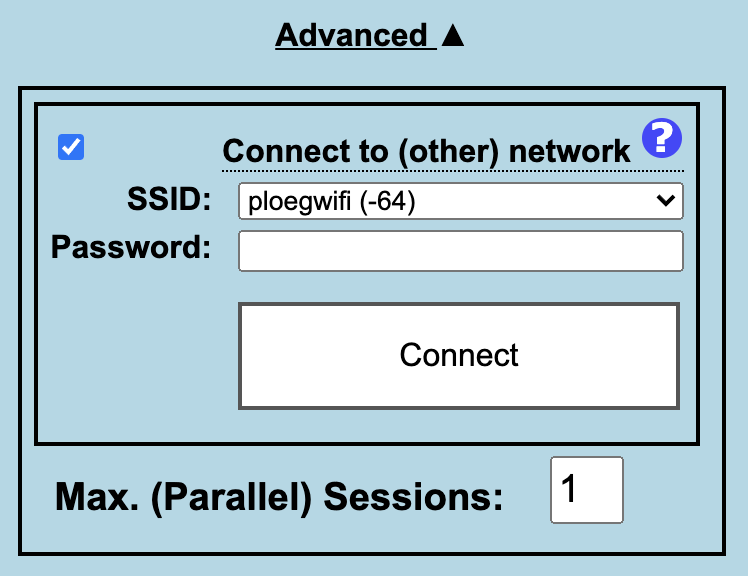
Here you can check "Connect to (other) network". Now you can enter the SSID and Password for the external Access Point to connect to. The dropdown shows the top 10 surrounding wireless networks available. Hit Connect to reconfigure ConsoleCast.
It will then try to connect to the given network with the supplied password. It will drop the active connection while doing so (you will get a message with available options). ConsoleCast will blink shortly when the connection is astablished. It sometimes can take a while for ConsoleCast to find the right wifi channel (up to about 30 seconds) but most times the switch is done in just 5 to 10 seconds. When the blinking stops you have the following options:
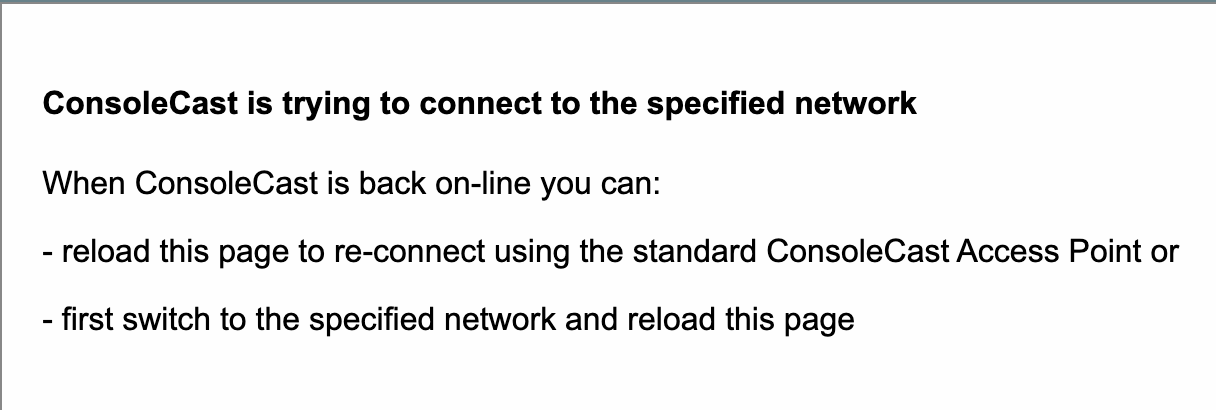
So, you have the option to stay connected directly to ConsoleCast as a private Access Point or attach your workstation to the network that ConsoleCast has joined now (the one you just configured) and open "https://cc.local" from there. Also in the Advanced settings you can limit the number of connections. This limits the number of clients that can connect simultanious to ConsoleCast. The default is 2 and that is probably the limit for most cases (resources are limited). **NOTE: limiting sessions is not yet implemented
Go to Firmware info page
Add the ConsoleCast Certificate as Trusted
To add the ConsoleCast certificate as trusted to your system can vary depending on your operating system and browser. Below you will find instructions for Chrome on MacOS and Windows that are valid at the time of this writing. Keep in mind that this can change as vendors update functionality and features over time. Perhaps you need to investigate the correct procedure for your setup. In most cases this involves steps to extract the certificate from ConsoleCast and adding it to a registry as trusted.
Adding the certificate as trusted for Chrome on MacOS
- Open a new TextEdit document
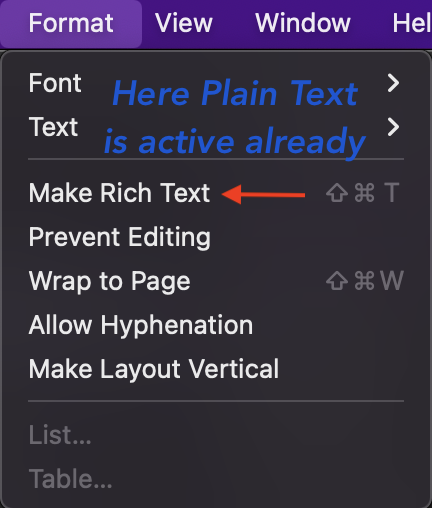
- In TextEdit, click Format | Make Plain Text (if not set already)
- Arrange windows so that the TextEdit window and the Chrome window are both visible
- In Chrome, Navigate to ConsoleCast and click through the usual warnings for untrusted certificates
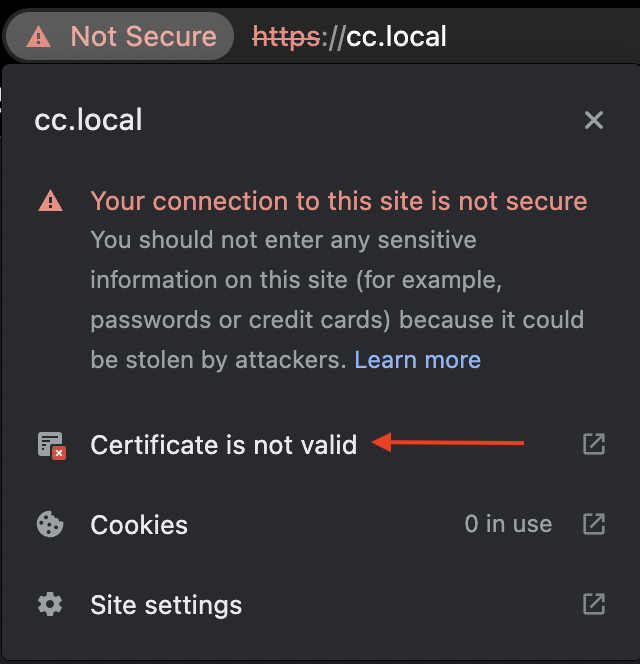
- Click the icon to the left of the URL in the address bar
- In the dropdown list, click Certificate
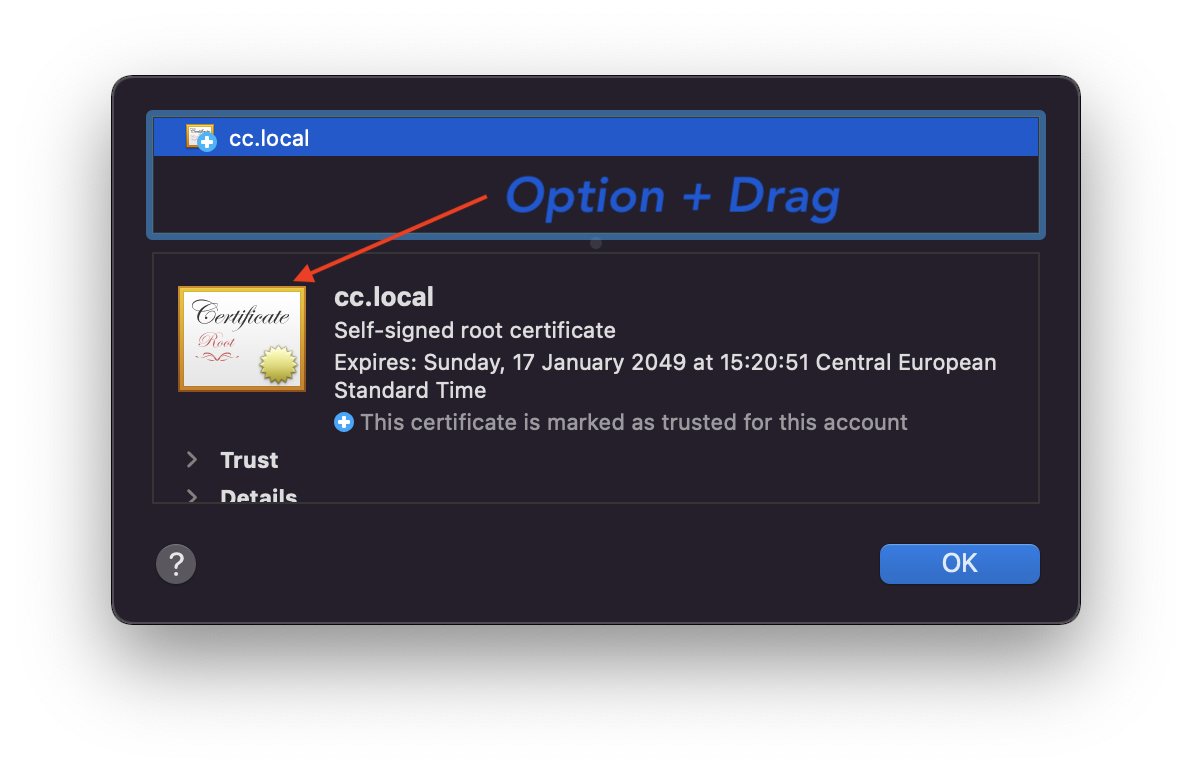
- Hold down the Option key while dragging the large certificate icon to the body of the TextEdit document (you may have to select the certificate window first to avoid TextEdit to disappear to the background).
- Save the TextEdit document with a .pem extension
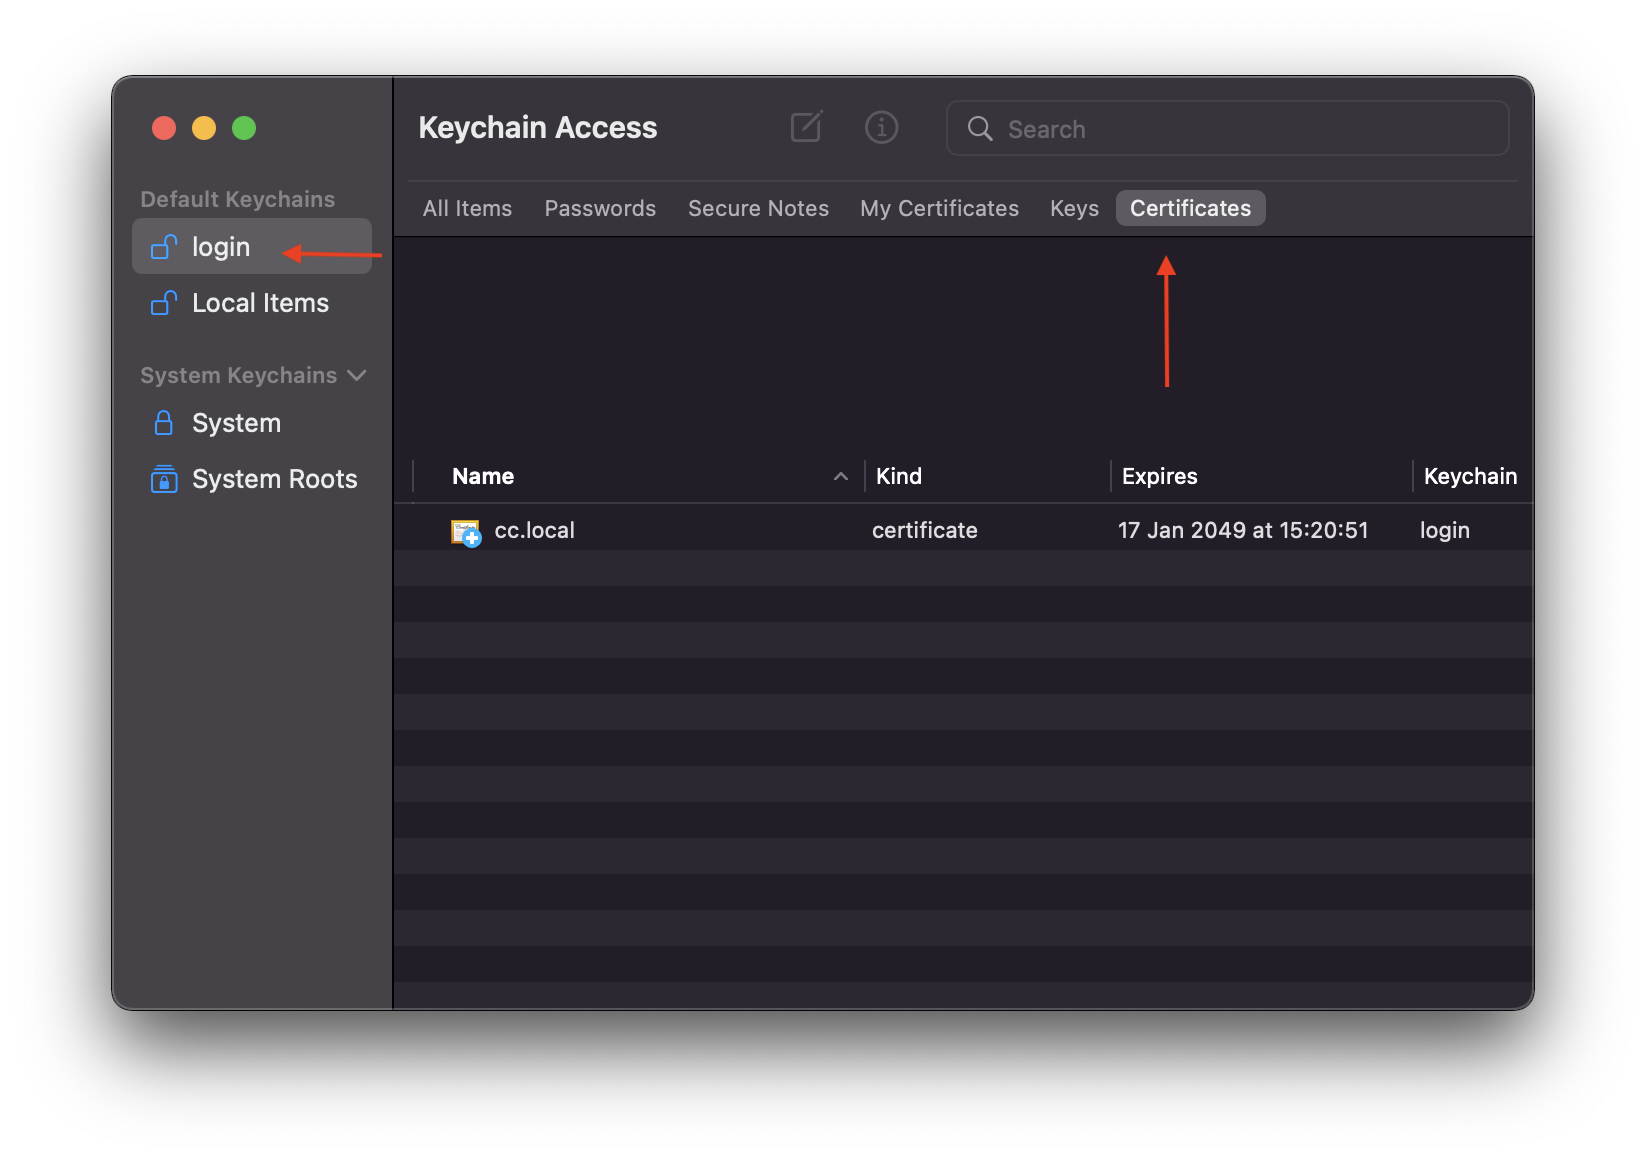
- Open the Keychain Access app and select the Certificates tab on the login keychain
- Now drag the .pem document created earlier to the Keychain window
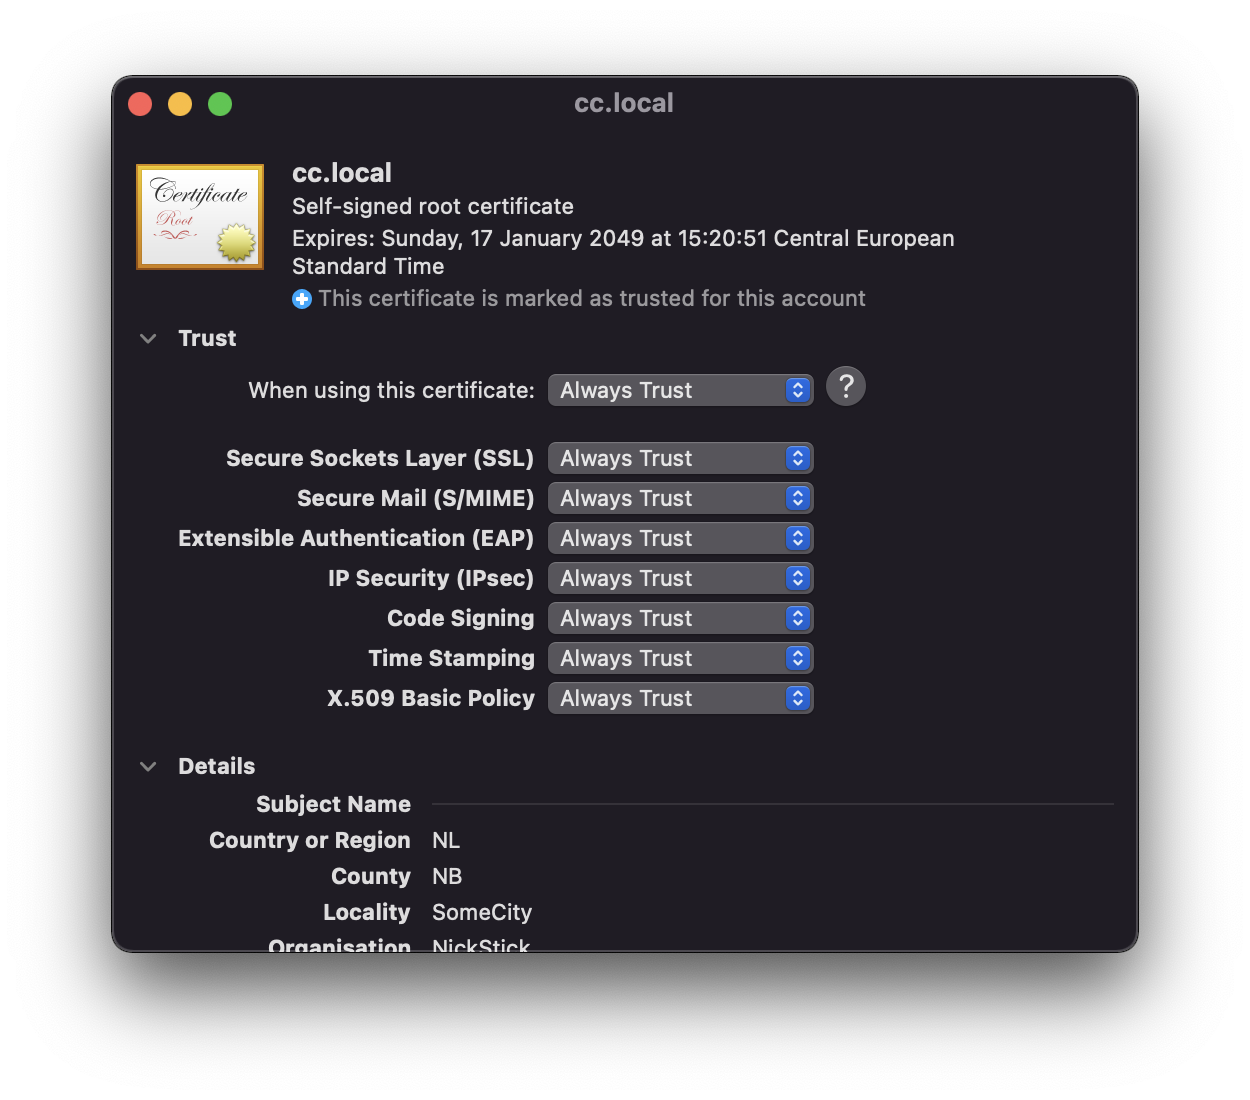
- Double click the just added entry and expand the Trust setting and set it to "Always Trust"
- Close the window (you may have to enter your password to make these changes)
- Navigate to ConsoleCast again; this time you should see the closed padlock and "Secure" annotation to the left of the URL
Adding the certificate as trusted for Chrome on Windows
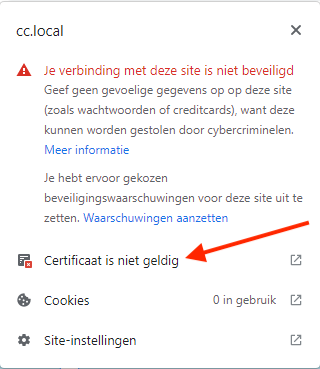
- In Chrome, Navigate to ConsoleCast and click through the usual warnings for untrusted certificates
- In the address bar, right click on the red warning triangle and "Not secure" message and, from the resulting menu, select "Certificate" to show the certificate
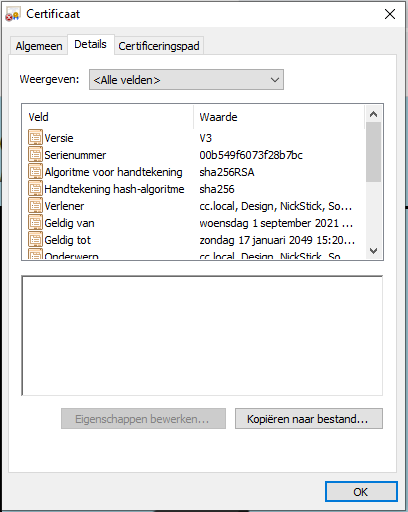
- In the window that pops up, select the "Details" tab (immediately to the right of "General"), and click on the "Copy to File..." at the bottom right of the tab
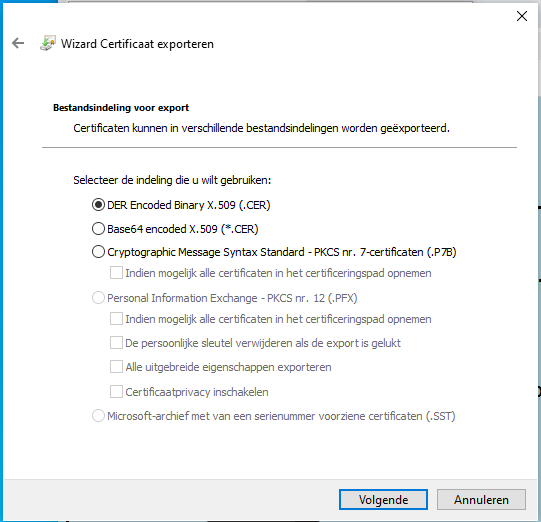
- This launches the Certificate Export Wizard; click "Next" at the bottom, which takes you to a radio-button dialogue for selecting the format. Leave the default "DER encoded binary X.509 (.CER)" and click next again
- Use the "Browse..." button to select a filename Documents (or wherever you'd like to leave the exported cert), and remember the name and path. Click "Next" to export the cert and then "Finish"
- You should get another pop-up window telling you the export was successful. Click "OK" to dismiss it, and again in the original "Certificate" pop-up window to dismiss it too
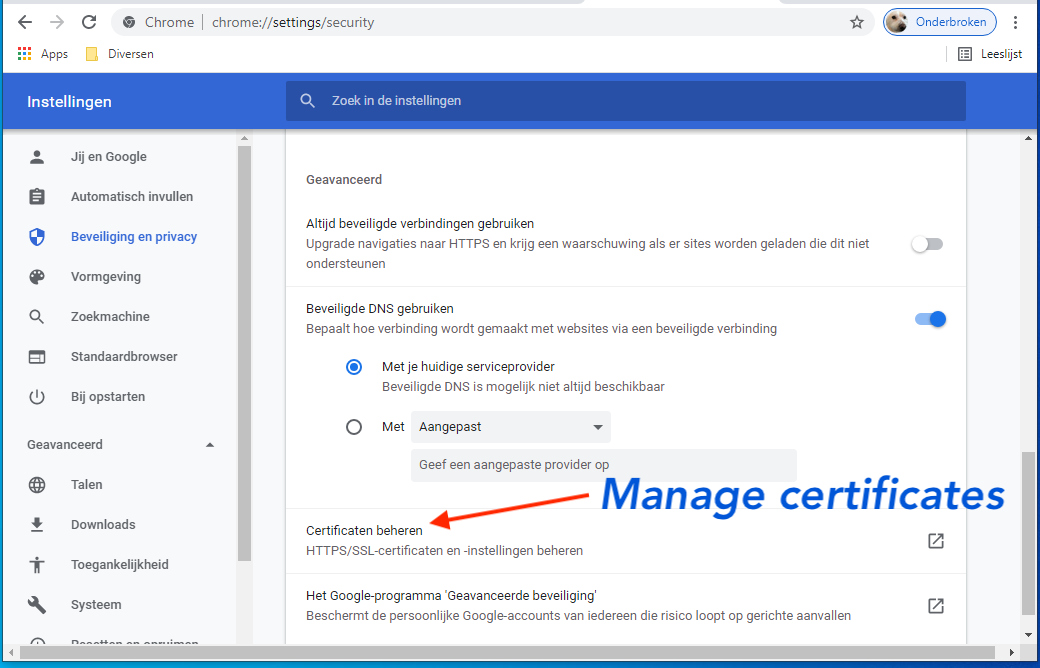
- Next open the Chrome settings page, in the "Privacy and security" panel, click on "Manage certificates"
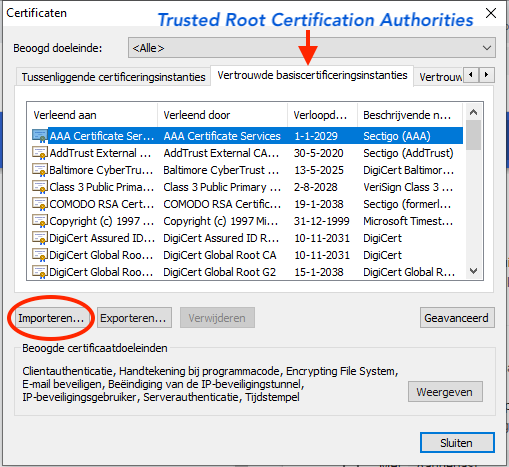
- In the pop-up "Certificates" window, select the "Trusted Root Certification Authorities" tab, and click on the "Import..." button; this will launch the Certificate Import Wizard
- Click "Next" and, on the next page, select "Browse..." and use the explorer window to locate the certificate you exported at step 5 above
- Click "Next" again, then "Finish", and, in the "Security Warning" pop-up, click on "Yes"; you should see yet another pop-up letting you know that the import was successful
- Restart Chrome, and navigate to ConsoleCast again; this time you should see the closed padlock and "Secure" annotation to the left of the URL